click Files => from the Other section of the Full Menu.
Select Files => from the Other section.
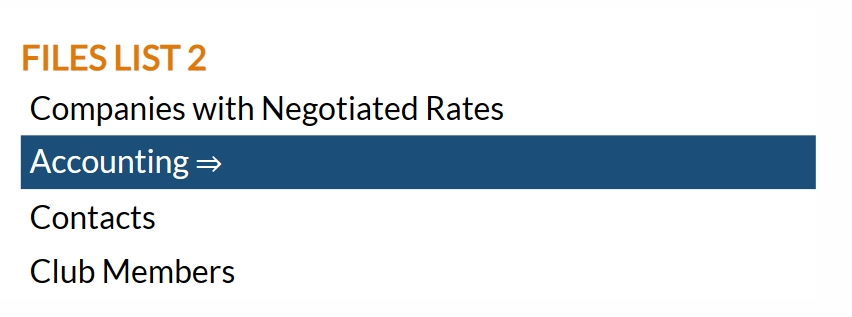
The Files Menu is divided into two sections, Files List 1 and Files List 2.
Select the Accounting => command from the Files List 2 section.
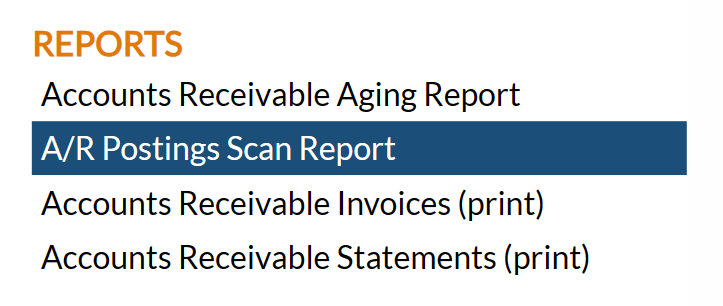
The Accounting Menu is divided into two sections, General and Reports.
Select the A/R Postings Scan Report command from the Reports section:
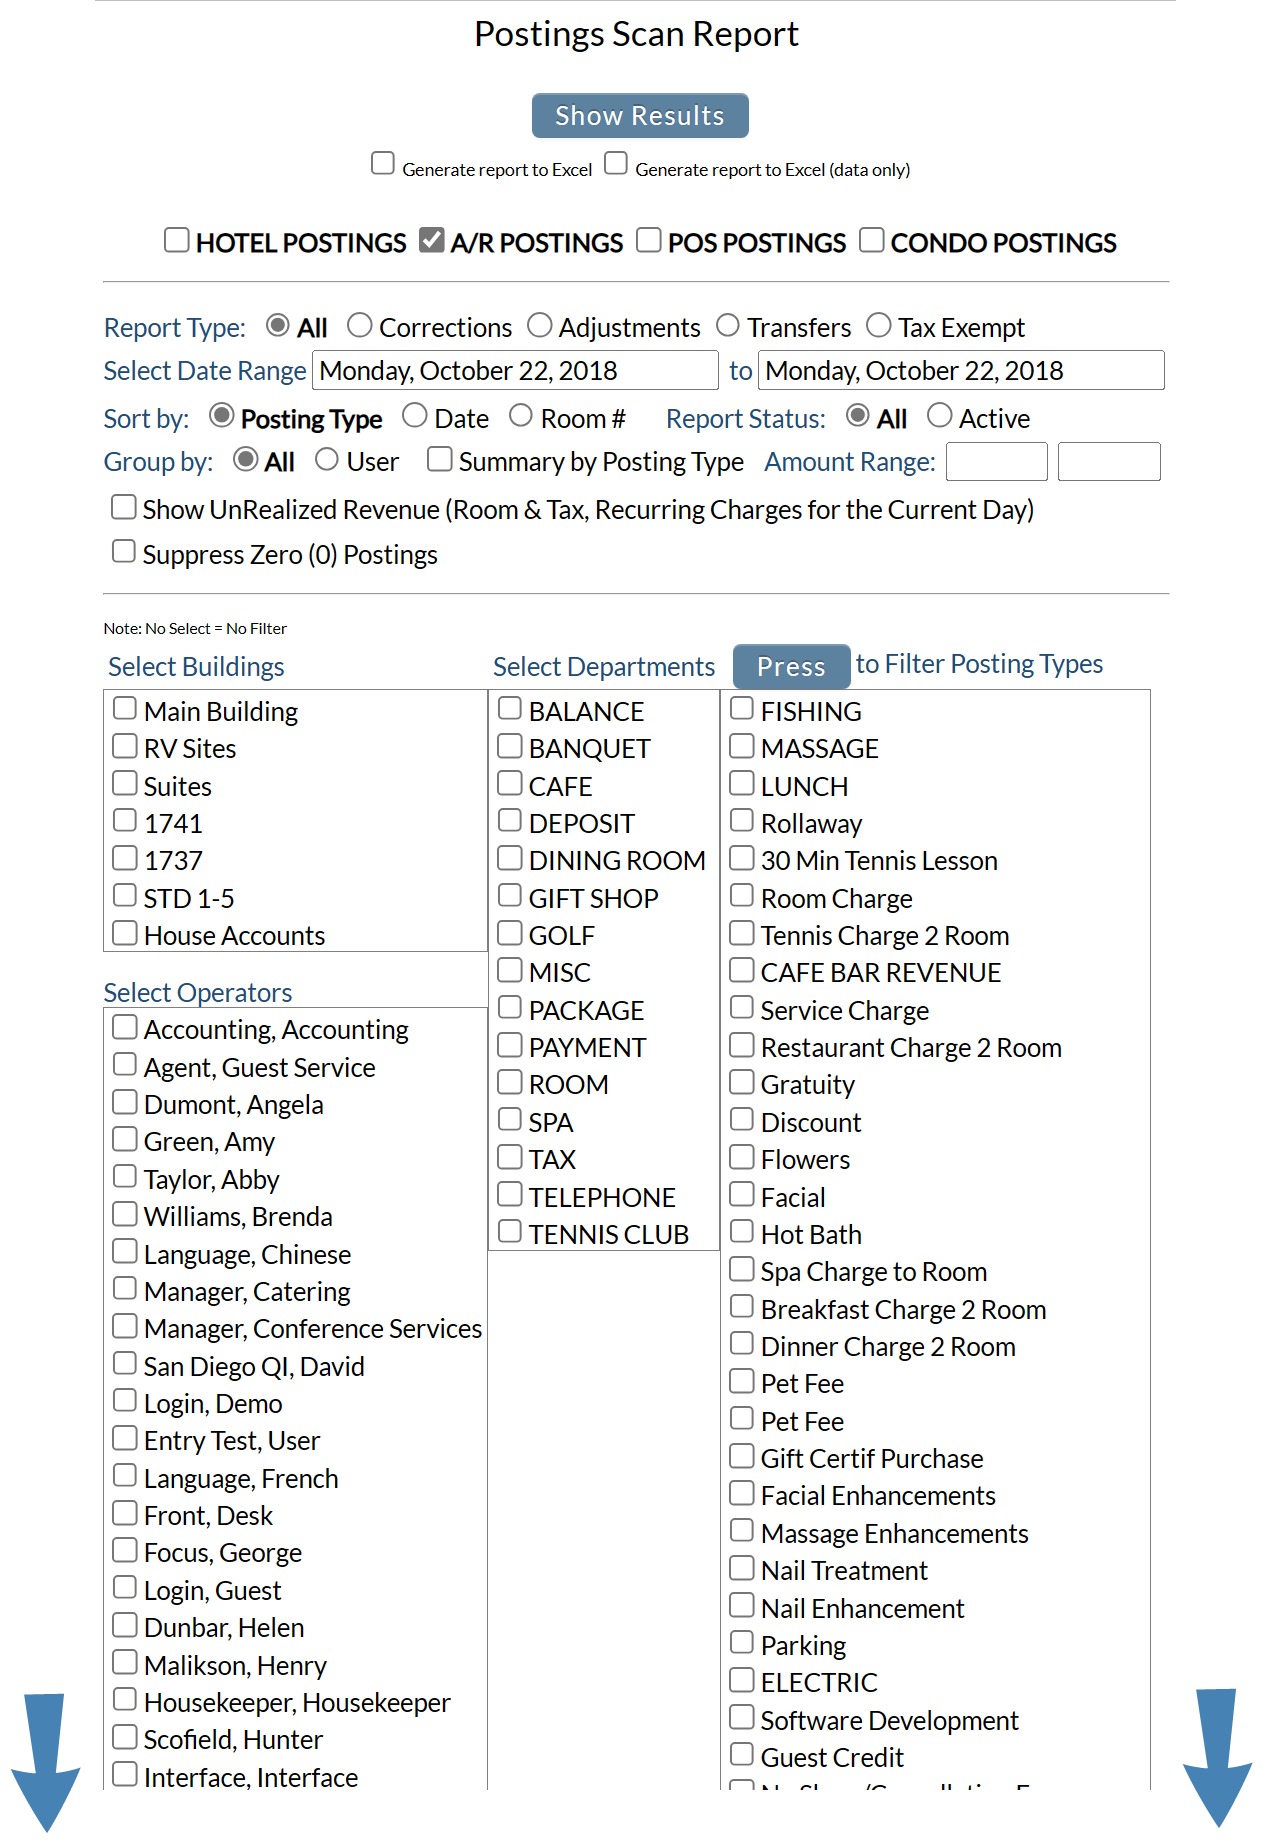
When selected, the Postings Scan Report Screen will open, with the A/R Postings option already checked.
Note: The Postings Scan Report screen has options for reporting on Hotel postings, A/R postings, POS postings and Condo postings. You can therefore also generate a Hotel Posting Scan Report, a Condo Posting Scan Report , or a POS Postings Scan Report from this screen by selecting the specific option instead of the A/R postings option. By reaching the screen using the A/R Postings Scan Report command, the check box for A/R postings will be selected automatically for you.
Postings Type: By default the box for A/R postings will be checked. Selecting any other postings option will automatically un-check the A/R option - only one can be selected at a time.
Select the appropriate reporting options for the Report. There are multiple options allowing you to tailor the report to your needs.
Report Type: Select a Report Type option from the radial buttons available. Only ONE option may be selected. Choose All for all postings, Corrections for only corrected postings, Adjustments for only adjusted postings, Transfers for only postings transferred to another folio, or Tax Exempt for postings that are tax exempt. By default it is set on All.
Select Date Range: Select a Date Range for the report. Clicking in the date field will show a calendar icon allowing you to choose both the start and end dates for the report. By default it is set to today's date (one day of reporting).
Sort by: Select the Sort Order from the radial buttons available to determine how the postings listed in the report are sorted. Only ONE option may be selected. Choose Posting Type, Date or Room #. By default it is set to Posting Type.
Report Status: The report may show all postings, or just active postings. Choose one. By default, All is selected.
Group by: This determines the order of data displayed in the report. Choose from All or User. By default it is set to All.
Summary by Posting Type: This checkbox may be checked if you wish to show a SUMMARY (total) for each of the POS posting types, rather than the individual postings on the report. This can help to reduce the size of the report. By default it is unchecked.
Amount Range: If you wish to limit the report to showing the POS postings that were for certain amounts only, you can enter the from and to amounts into the two fields here. If used, only postings that fall within the amount range will be shown. This can help to reduce the size of the report. By default the fields are left blank, meaning all postings (for any amount) will be shown.
Show UnRealized Revenue (Room and Tax, Recurring Charges for the Current Day): This checkbox option allows you to see any revenue not yet posted that will be for the day during night audit. Select this check box to show expected room, tax, and recurring charges that are due but have not been posted for the date range identified for the report. By default it is unchecked. Note: It is not usually relevant to the POS Postings Scan Report.
Use Server assigned to Check: This checkbox may be checked to show postings by each Server when a different user is acting as Cashier. By default it is unchecked.
Suppress Zero (0) Postings: This checkbox may be checked to suppress any postings that are for 0.00 from showing on the report. This can help to reduce the size of the report. By default it is unchecked. Note: This option is primarily useful for the POS Postings Scan Report.
Complete the fields described below: Select the appropriate reporting options for the Report.
The report may be filtered further, by selecting the options you wish to see shown on the report from the Building, Operators, Departments and Posting Types categories listed.
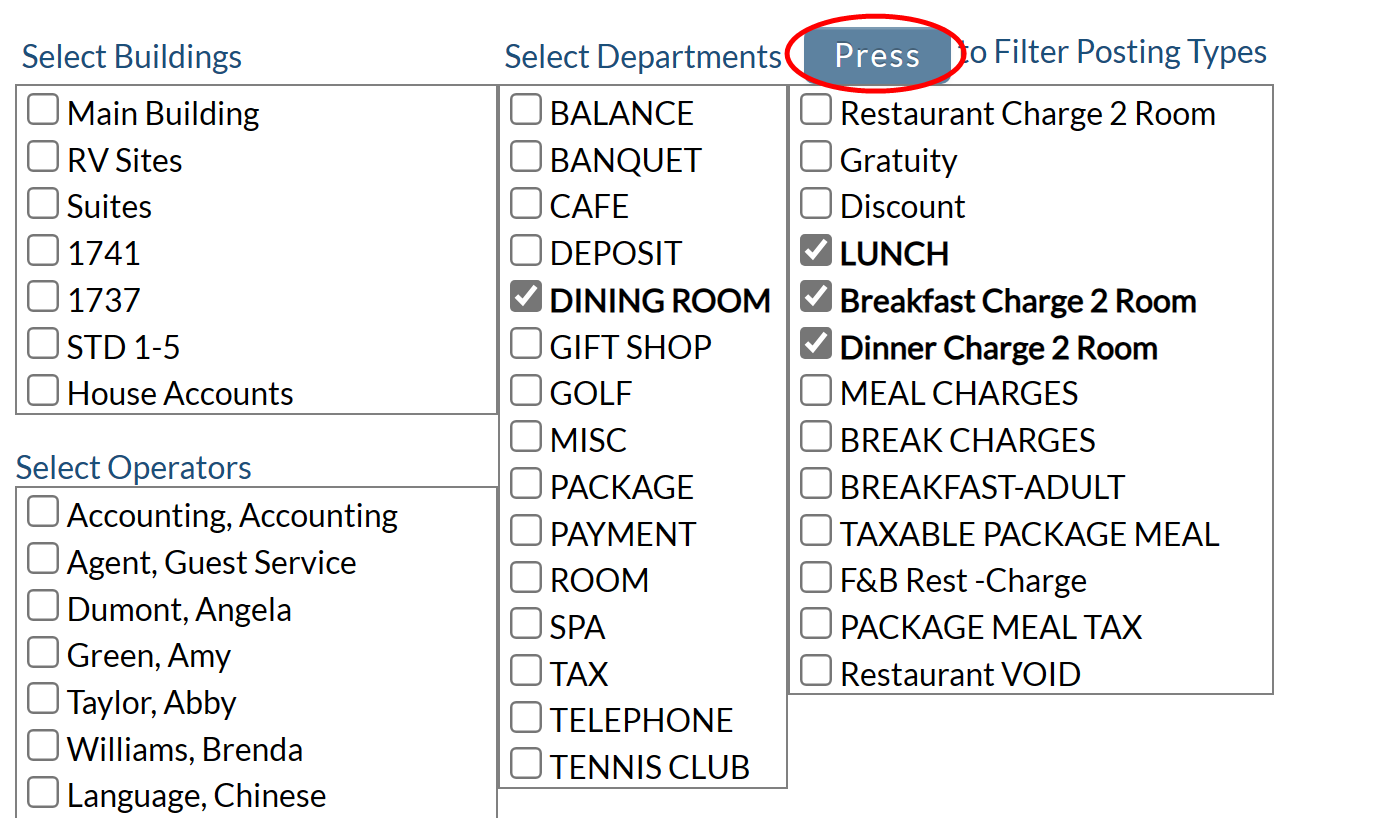
Note: Selecting specific Departments to show on the report will change the options available in the Posting Types list (to show only those available within the selected department(s) ).
Use the check boxes in the Select Buildings, Select Operators, Select Departments, and Posting Types lists to filter the report to show only those options selected. This can help to reduce the size of the report and show only what you are interested in.
Note: For the Building, Operators and Departments categories, selecting a checkbox will AUTOMATICALLY update the screen. For Posting Types (due to the probability that multiple will be selected), you will need to click the button marked "Press" above the section once you have marked all the relevant Posting Types to update the report screen with your selections.
Note: No Selections = No Filter.
When you are finished with the report options and filter settings, click the Show Results button at the top of the screen to generate the report.
By default, the report is generated in PDF form and opens in a separate browser window. From there you can select to save or print the report, among other options. If you prefer, you can select the Generate report to Excel or Generate report to Excel (data only) check box to print the report in Microsoft Excel format instead of PDF. The information in this case will be correct for importing into another document rather than immediate viewing.
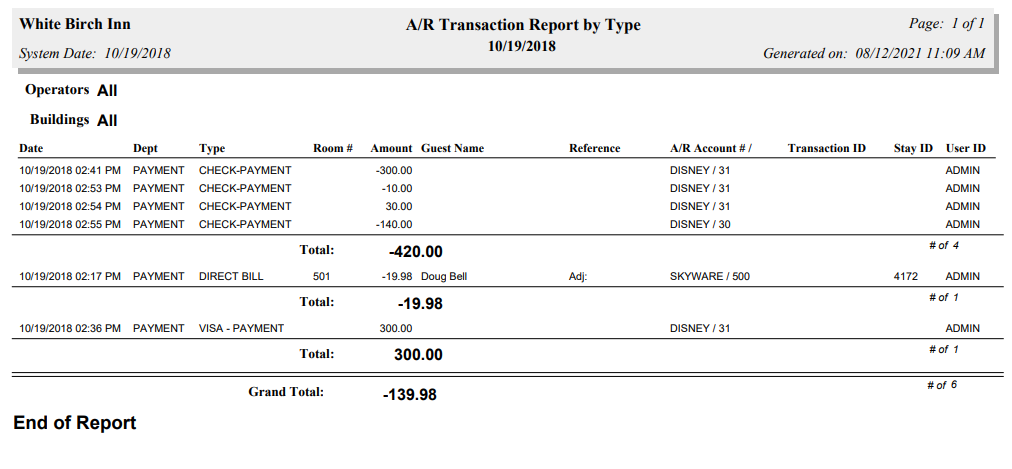
This will generate the A/R Postings Scan Report (A/R Transaction Report).
Once generated, the report shows, for each A/R posting type, the posting date, post department and type, room number, amount, guest name, any reference, the A/R account # associated with the posting, any transaction ID, the relevant stay ID, and the User ID, with a total section for each posting type and a grand total of all revenue.
Note: IF the Summary by Posting Type option was selected, the report does not show the breakdown details of the posting types, instead showing simply the revenue totals for each posting type and the grand total.
NOTE: The generated report appears as a pop-up window through your browser. If your browser is set to block pop-ups, you may receive a warning banner at the top of the browser. Click this banner and select to allow pop-ups so that you can view the report.


